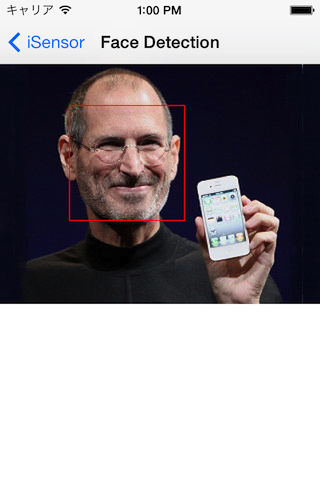
2016.4.29 追記:Swift版の記事を書きました
iOS 5から追加された CIDetector を使って、顔検出機能を使う方法をメモしておきます。
実装方法
まずは「CoreImage.framework」を追加します。

インスタンスを生成します。
NSDictionary *options = [NSDictionary dictionaryWithObject:CIDetectorAccuracyHigh
                                                    forKey:CIDetectorAccuracy];
CIDetector *detector = [CIDetector detectorOfType:CIDetectorTypeFace
                                          context:nil
                                          options:options];
detectorOfType には検出タイプを指定します。今回は顔検出なので、CIDetectorTypeFace を指定します。*1
options には検出精度 CIDetectorAccuracy 等を指定できます。
- CIDetectorAccuracyLow - 精度は低いが、パフォーマンスは良い
- CIDetectorAccuracyHigh - 精度は高いが、パフォーマンスは悪い
次に、顔検出を実行します。
CIImage *ciImage = [[CIImage alloc] initWithCGImage:originalImage.CGImage];
NSDictionary *imageOptions = [NSDictionary dictionaryWithObject:[NSNumber numberWithInt:1]
    forKey:CIDetectorImageOrientation];

NSArray *array = [detector featuresInImage:ciImage options:imageOptions];
featuresInImage には、顔検出したい画像を CIImage クラスで指定します。
options には画像の向きなどを指定します。カメラの画像を利用する場合には、デバイスの方向を正しく指定しないと顔検出ができないので注意してください。この辺りはAppleのサンプルコードがとても参考になります。
UIDeviceOrientation curDeviceOrientation = [[UIDevice currentDevice] orientation];
switch (curDeviceOrientation) {
    case UIDeviceOrientationPortraitUpsideDown:  // Device oriented vertically, home button on the top
        exifOrientation = PHOTOS_EXIF_0ROW_LEFT_0COL_BOTTOM;
        break;
    case UIDeviceOrientationLandscapeLeft:       // Device oriented horizontally, home button on the right
        exifOrientation = PHOTOS_EXIF_0ROW_TOP_0COL_LEFT;
        break;
    case UIDeviceOrientationLandscapeRight:      // Device oriented horizontally, home button on the left
        exifOrientation = PHOTOS_EXIF_0ROW_BOTTOM_0COL_RIGHT;
        break;
    case UIDeviceOrientationPortrait:            // Device oriented vertically, home button on the bottom
    default:
        exifOrientation = PHOTOS_EXIF_0ROW_RIGHT_0COL_TOP;
        break;
}
imageOptions = [NSDictionary dictionaryWithObject:[NSNumber numberWithInt:exifOrientation]
    forKey:CIDetectorImageOrientation];
NSArray *features = [faceDetector featuresInImage:ciImage
    options:imageOptions];
正常に顔が検出されると、検出結果が CIFaceFeature オブジェクトで返ってきます。このオブジェクトには、検出された顔の範囲や、目と口の位置などが含まれます。
- bounds - 顔の範囲
- hasLeftEyePosition - 左目の位置を検出できたか
- hasMouthPosition - 口の位置を検出できたか
- hasRightEyePosition - 右目の位置を検出できたか
- leftEyePosition - 左目の位置
- mouthPosition - 口の位置
- rightEyePosition - 右目の位置
ここで注意したいのは、CoreImage は、左下の座標が (0,0) となる点です。よって、検出元画像の上に部品を載せたい場合は、座標をUIKitの座標系に変換する必要があります。
CGAffineTransform transform = CGAffineTransformMakeScale(1, -1);
transform = CGAffineTransformTranslate(transform, 0, -self.imageView.bounds.size.height);
// UIKit座標系に変換
const CGRect faceRect = CGRectApplyAffineTransform(faceFeature.bounds, transform);
これで顔検出ができました。
顔検出というと難しそうなイメージが有りますが、座標系のところ以外は、意外と簡単に使用できますね。
サンプル
https://github.com/koogawa/iSensor/blob/master/iSensor/FaceDetectionViewController.m

補足
- iOS 6からは動物の顔も認識できるようになったようです
- 犬の顔も認識できるiOS 6のカメラ!〜パワーアップした顔認識精度の実力を検証〜 | AppMama - iPhoneアプリ開発者の妻のブログ
- iOS 7からは笑顔検出もできるようになったようです
- iOS 7 の新機能のサンプルコード集『iOS7 Sampler』を公開しました。 - その後のその後
参考にさせて頂いたリンク
*1:今のところ CIDetectorTypeFace しか設定できないようです